

Do you want to create a membership website? how do I create a membership site with WordPress? For an extended time, website owners relied solely on advertising and affiliate revenue to monetize their content.
A membership website allows you to make money online by allowing users to pay for premium content, features, and access to the community.
You will need a platform that has features for managing users, memberships, payments, etc. Luckily, there are some really great membership plugins for WordPress that make it super easy.
In this step-by-step guide, we’ll show you ways to simply create a WordPress membership site with none coding knowledge.

how do I create a membership site with WordPress
Unlike 10 years ago, it’s quite easy to form an internet site lately. Out of all the platforms and website builders, WordPress makes it the simplest for anyone to create their own membership website and begin selling with little to no technical skills.
You’ll need the following three things to start:
- A domain name. This will be your website’s address (Example, google.com).
- A web hosting account. This is where your website files are stored.
- A membership addon (It will convert your regular website into a membership platform).
You can found out a totally functional membership website with WordPress in but half-hour , and we’ll walk you thru every step of the method .
Below are the steps that we’ll cover to assist you to create a strong membership website with WordPress.
Ready? Let’s get started.
Step 1. Getting Started with a WordPress Membership Site
To create a membership site, you want to confirm that you simply are using the proper WordPress platform. Yes, there are two sorts of WordPress.
We recommend using the self-hosted WordPress.org version because it gives you unrestricted access to all or any features and tools that you simply need (see the complete comparison of WordPress.com vs WordPress.org.)
You’ll need a WordPress hosting account, name , and an SSL certificate for a self-hosted WordPress site.
Typically, a website name costs around $14.99 / year, web hosting around $7.99 / month, and an SSL certificate costs around $69.99 / year.
If you’re just starting, then these startup costs can add up quickly.
Thankfully, we’ve how to repair that.
HostGater, an official WordPress recommended hosting provider, has agreed to offer our users a free domain name, a free SSL certificate, and a discount on web hosting.
Basically, you can get all of the above for $2.75 per month.
Note: At Wehavedigitaltool we believe in full transparency. If you sign up with HostGator using our referral link, then we will earn a small commission at no extra cost to you (in fact, you will save money and get a free domain + SSL certificate). We would get this commission for recommending just about any WordPress hosting service, but we only recommend products that we use personally and believe will add value to our readers.
Once you’ve got signed up for hosting, the subsequent step is to put in WordPress. Follow the instructions in our step by step guide the way to start a WordPress blog, and you’ll be up and running in no time.
Since HostGator already comes with WordPress pre-installed, you can move on to setting up your WordPress membership site.
Step 2. Choosing a WordPress Membership Plugin
There are many free and paid WordPress membership plugins that you simply can use. However, all of them have their own pros and cons. we have got a full comparison of the simplest WordPress membership plugins.
To choose the right WordPress membership plugin, you need to decide what kind of membership website do you want to build and what features will you need?
If you only want to permit user registration on your WordPress site, then you’ll use mailpoet. it’s a WordPress form builder plugin that permits you to simply create user login and registration forms. you’ll even allow users to submit articles without accessing the WordPress admin area.
On the other hand, if you want to sell subscriptions, paid content, or digital downloads, then you’ll need a more robust WordPress membership plugin, like MemberPress.
MemberPress comes with advanced membership features that allow you to accept payments, create membership levels, restrict access based on levels, and more.
Selling online courses can be another possible scenario. In this case, you’ll need LearnDash, a complete WordPress LMS plugin with all the learning management features.
You can also integrate LearnDash into MemberPress to create a powerful website with online courses as well as membership subscriptions.
That being said, let’s start setting up your WordPress membership website.
Step 3. Setting up Your WordPress Membership Website
We are choosing MemberPress as our go-to plugin because it’s all the features we mentioned above, and it works perfectly with third-party plugins necessary for the expansion of your business.
First thing you need to do is install and activate the MemberPress plugin. For more details, see our step by step guide on how to install a WordPress plugin.
Upon activation, you need to visit the MemberPress » Options page to configure the plugin settings.
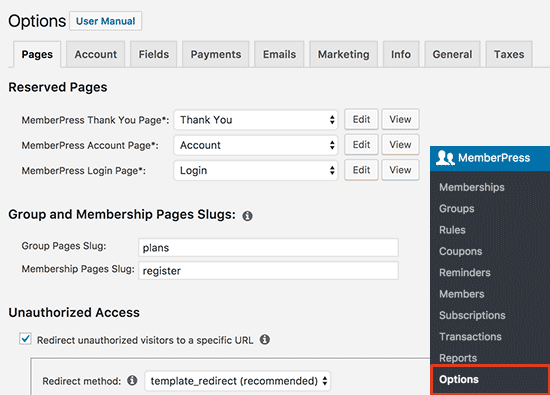
Step 4. Add a Payment Method
The options page is divided into different tabs. The first thing you need to set up is a payment gateway because it allows you to accept payments on your membership site.
You can do this by switching to the ‘Payments’ tab and then selecting your payment gateway.
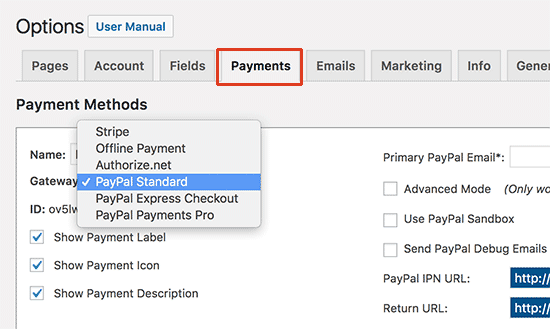
MemberPress supports PayPal (Standard, Express, and Pro), Stripe, and Authorize.net out of the box. You need to select the payment method you want to set up and provide the required credentials.
You can also add multiple payment methods by clicking on the add button to add another payment method.
We typically use two options: Stripe for credit cards and PayPal as a secondary option because some users prefer PayPal over giving out credit card details.
Don’t forget to click on the ‘Update Options’ button at the bottom of the page to save your settings.
Step 5. Creating Membership Levels
The next step is to make membership levels that your users can buy . Each membership level can have different pricing plans, perks, and access. You can even have a free membership plan.
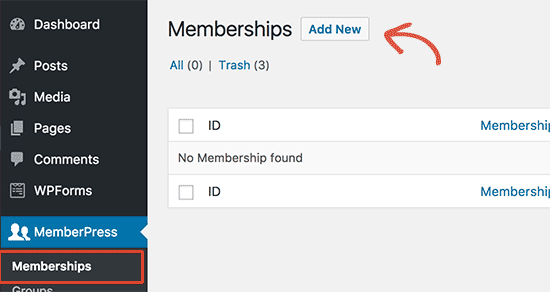
To create a membership level, you would like to travel to MemberPress » Memberships page and click on on the ‘Add New’ button at the highest.
On the next page, enter a title for this particular membership plan and then provide the plan details in the post editor.
You will need to set the pricing and expiration for this plan under the membership terms section.
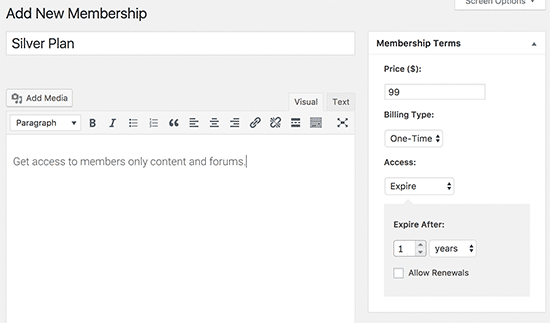
In the example above, we have created a yearly membership plan.
After that, you need to scroll down to the membership options meta box below the post editor. This is where you can customize permissions and membership options for this particular plan.
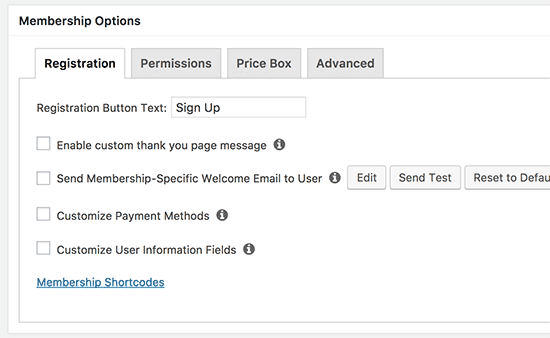
Once you’re satisfied with the membership plan, you’ll click on the publish button to form it available.
Go ahead and repeat this process to make as many membership plans that you simply need.
Step 6. Restrict Access for Membership Plans
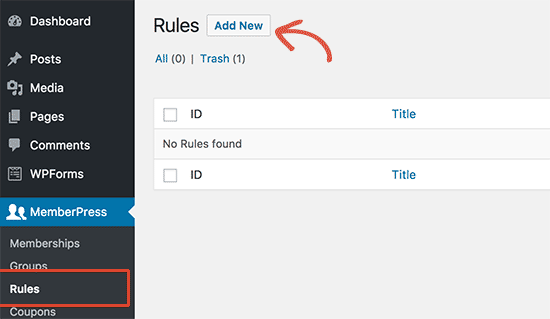
The next step is to select which content would be available to different membership plans on your website. MemberPress makes it very easy to control access using ‘Rules’.
You can setup rules by visiting the MemberPress » Rules page and clicking on the Add New button at the top.
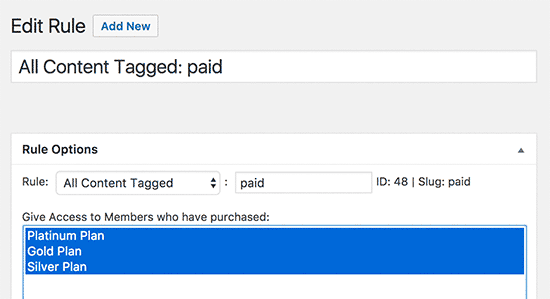
The rule edit page allows you to select different conditions and associate them to a membership plan.
For example, you can select all content that matches a particular tag or category to be available only to members with the silver subscription plan.
You can also create more specific rules. For example, one post or page, child pages, or a selected URL.
Below the principles editor, you’ll see the content drip and expiration options.
Drip content allows you to gradually release content to users rather than giving it all away directly . The expiration option makes the content unavailable after an outlined period of your time.
If you’re unsure , then you ought to leave them unchecked.
Once you’re satisfied, plow ahead and click on on the ‘Save Rule’ button to save lots of your rule settings.
Repeat the method to make more rules as required for your membership site.
Step 7. Adding Members Only Content
MemberPress makes it super easy to create members-only content using Rules.
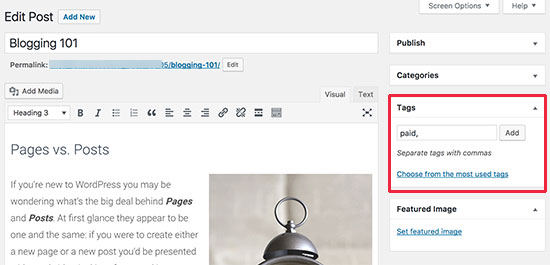
In the above example, we created a rule that restricted all content tagged as paid to be restricted. Now, all we need to do is to create our paid content and add the paid tag to it.
MemberPress also adds the ‘MemberPress Unauthorized Access’ meta box below the post editor. This allows you to pick what logged-out users (non-members) will see once they reach this content.
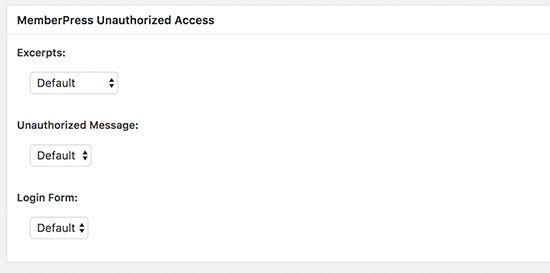
You can use the global default settings, or you can show excerpts, login form, or a custom message.
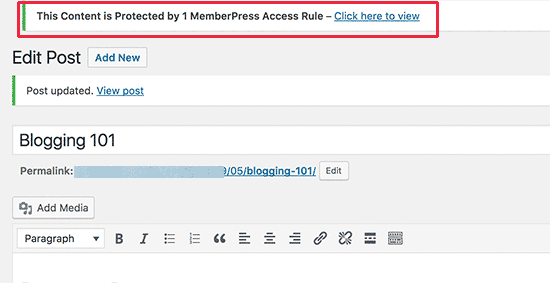
Once you have added members-only content, you can go ahead and publish it. As the page reloads, you will see a success message that this content is protected.
Step 8. Create a Pricing Page
This is the page your users will see when they want to sign up for a membership plan. On this page, users will be able to select a membership plan and then move to the payment page.
Users who try to access the restricted or paid areas of your website will also be redirected to this page.
You can configure this by going to MemberPress » Groups page and clicking on the Add New button at the top.

First, enter a title for the group plan page. This will also be the title for the plans page that users will see.
Next, go down to ‘Group options’ metabox and add memberships that you want to display on the page.

You can also select a theme for the pricing table. MemberPress comes with few ready-made templates for that.
Once satisfied, click on the ‘Publish’ button to make your plan publicly visible.
To preview your pricing page, click on the ‘View Group’ link after publishing it.

Redirect users to pricing page
Now that we have the pricing page ready, the next step is to redirect unauthorized users to the pricing page.
To do that, first you need to visit MemberPress » Groups page and copy the URL next to the group you created in the previous step.

After that, go to MemberPress » Options page and scroll down to the ‘Unauthorized Access’ section.
You need to check the box next to ‘Redirect unauthorized visitors to a specific URL’ option and then paste the group URL you copied earlier.

Click on the ‘Update Options’ button to save your settings.
Now unauthorized users will be redirected to the pricing plans page when they try to access a members only area.
Step 9. Add Sign up and User Login Forms
Now that you have everything set up, it is time to allow your users to easily find their way around your website.
First, you need to add a user login form so that members can sign in to their accounts.
Go to Appearance » Widgets and add ‘MemberPress login’ widget to a sidebar.

Next, we will be adding the pricing page link to the navigation menu, so that new users can select a plan and register.
You can do this by visiting the Appearance » Menus page in your WordPress admin. From the left column, you need to click on the Groups tab to expand it. It will show the pricing plan group you created earlier.

Check the box next to your pricing page and then click on the ‘Add to menu’ button.
The pricing plan page will now appear in the right column. You can drag and drop to rearrange its position in the menu. You can also edit it and change the link text.

Don’t forget to click on the save menu button to store your changes.
You can now log out of the WordPress admin area and visit your website to see everything in action.

Step 10. Customizing Membership Email Templates
Your WordPress membership plugin will send several email notifications to members. MemberPress allows you to simply edit those emails and make changes to incorporate your own branding.
Simply attend MemberPress » Options page and click on on the ‘Emails’ tab. From here you’ll manage email notifications sent by MemberPress.
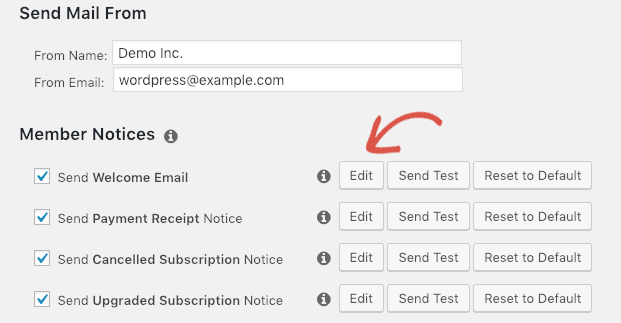
You will see all the email notifications sent by MemberPress to members as well as Administrators. You can click on the edit button to customize any of these notices.
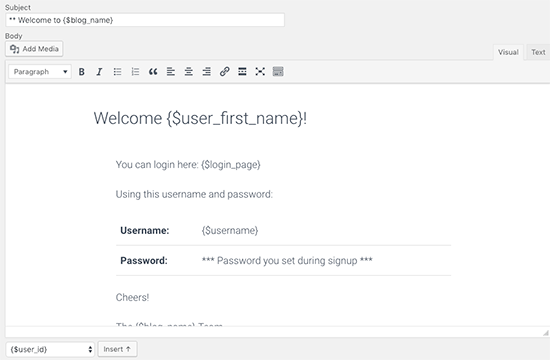
You can use an easy text editor to edit the e-mail message with basic formatting options and smart tags to insert dynamic items like names, username, membership level, and more.
Make sure that you simply click on the ‘Send Test’ button to send yourself a few of test notifications. This will make sure that MemberPress can send email notifications.
If you are having trouble receiving email notifications, then see our guide on how to fix WordPress’s not sending email issues.
Step 11. Viewing Reports to Grow your Membership Website
To grow any business, you need data to make informed decisions. MemberPress comes with built-in reports to see how your membership website is doing.
Simply go to the MemberPress » Reports page. From here, you can sort reports by monthly, yearly, or all time data.
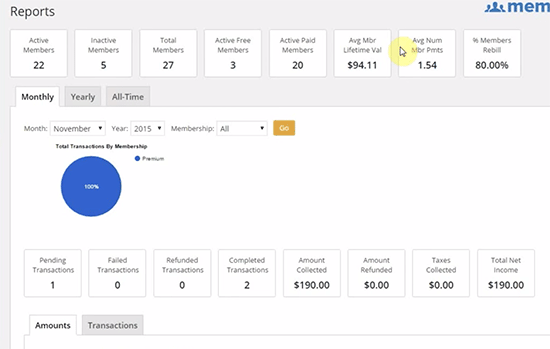
It will show you the number of active, inactive, free, paid, and total members. It will also show you the typical member lifetime value and other data. You can scroll below to ascertain more charts and click on on a date to look at transactions.
However, the foremost important metric of judging a membership website’s success is user engagement.
This is where you’ll need Google Analytics. It allows you to ascertain where your users are coming from and what they are doing once they are on your website.
MonsterInsights, the foremost popular Google Analytics plugin for WordPress, offers an entire MemberPress integration that creates it easy to enable Enhanced Ecommerce Tracking for MemberPress.
For detailed instructions, see our guide on the way to track user engagement using Google Analytics in WordPress.
Taking Your Membership Website to The Next Level
MemberPress is a powerful WordPress membership plugin. It allows you to easily grow your membership website.
It works beautifully with LearnDash, which allows you to easily create courses and leave the selling part to MemberPress.
You can also use it alongside BuddyPress and bbPress.
Here are some other useful resources to help you grow your WordPress membership site.
- Essential WordPress plugins – Our expert pick of the must have WordPress plugins for all business websites.
- WordPress Speed and Performance – The ultimate guide on how to speed up WordPress and boost performance.
- WordPress Security guide – This step by step guide will help improve your WordPress site’s security.
- Selecting the Perfect Theme – Beginner’s guide on how to select the perfect theme for your website.
- Common WordPress errors – The ultimate list of common WordPress errors and how to fix them.
That’s all, we hope this article helped you setup your WordPress membership website. You may also want to see our step by step WordPress SEO guide for beginners.