
If you have just inherited an existing WordPress site, what should you do first?
Whether you’re a business owner who recently acquired a new website or an office assistant who’s inheriting your company’s existing website from another team member, you might be wondering what the most important next steps are.
In this article, we will show you the top things you need to do when inheriting a WordPress site.

What Challenges Could You Face When Inheriting a Site?
Inheriting a new WordPress website brings a lot of challenges.
Whether you’ve acquired it from another business or assigned a company website, getting up to speed with the workflow and familiarizing yourself with WordPress can take time.
Similarly, running a website requires other tools like email marketing software or third-party plugins. When inheriting a website, you should have login credentials to all the software.
Other than that, your newly inherited website might not be secure. One of the best practices is to create a backup and scan your site for threats. This will help highlight areas that could lead to a potential attack and allow you to fix them quickly.
That said, let’s look at the things you should do when inheriting a new WordPress site. You can click the links below to jump ahead to your preferred section:
1. Get All The Passwords
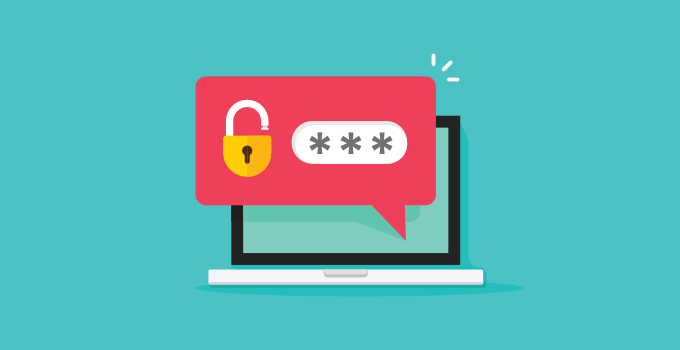
When inheriting a WordPress site, the first thing you must do is gather all the username and password information.
This includes your web hosting password, FTP password, CDN password, domain management password, email marketing service password, and password to all third-party premium plugins or services that the website is using.
We suggest scheduling a video call with the old developer or site owners because they can explain everything in detail.
The best way to manage all your website passwords is by using a password manager. We recommend using LastPass because it works with all your devices and allows storing passwords in a group, sharing them securely, and using stronger passwords.
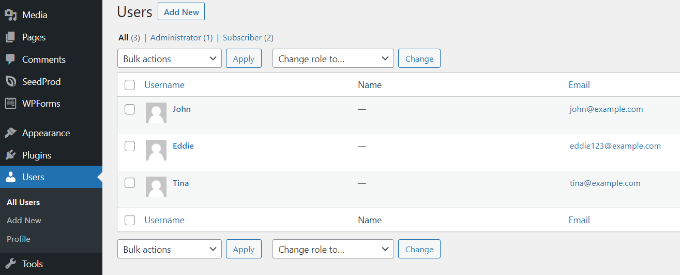
2. Change All Admin Password and Emails
Once you have received all the passwords, you need to change them.
This ensures that the previous developer or site owner cannot modify anything. Another thing you want to do is update all admin contact emails so only you can reset passwords in the future.
You can do this by going to the Users » All Users page in the WordPress admin area and editing all user passwords along with contact details.
Next, you need to change the WordPress site admin email address. WordPress uses it to send important website notifications.
Simply go to the Settings » General page and enter a new email address.
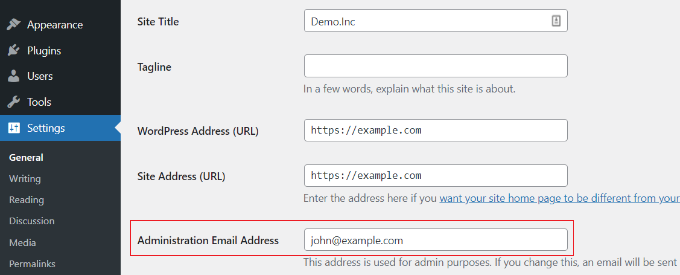
Note: We recommend installing WP Mail SMTP before changing emails to make sure all emails all notification emails reach their recipient.
3. Take Notes and Familiarize Yourself
Before making any other site changes, taking notes and familiarizing yourself with the website is vital. If you’re unfamiliar with WordPress, see our beginner guide on what is WordPress.
It is very important that you understand the importance and functionality of each WordPress plugin used on the website.
You would also want to review theme settings and the widgets you use.
You can take notes of different functionalities, features you would like to change, and more.
Note: Please write all these notes down in Google Docs, Dropbox Paper, or somewhere else so you won’t lose them.
This information will help you understand everything. If you need help understanding something, then you can try contacting the previous owner or developer.
4. Setup an Automated Backup Solution
Backups are your first layer of defense against any online mishap. The previous site owner may have their own backup plugins set up, which may be storing backup files in one of their remote storage accounts.
You would want to set up your own backups. There are plenty of excellent WordPress backup plugins that you can choose from.
You need to make sure that you set up your backups on a remote location like Google Drive, Dropbox, etc.
You also need to create a complete WordPress backup before making further changes to your website. This would help you revert your website in case anything goes wrong.
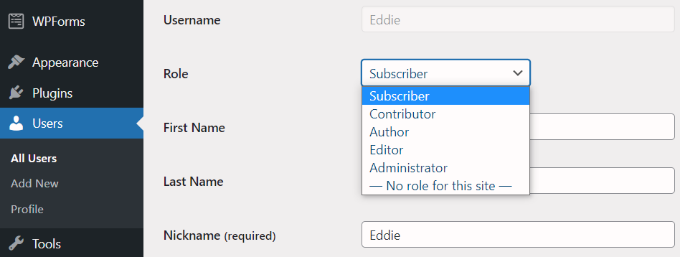
5. Update User Roles and Permissions
If you are a developer working on a website, then you’ll need to work with your client to assign user roles and permissions to their team.
Your goal should be to limit the administrator user role to people who actually need to perform admin tasks. These tasks include things like changing the theme, installing new plugins, or adding new users to the website.
To change a user role, simply go to Users » All Users from your WordPress dashboard and edit a user profile. Next, scroll down to the ‘Role’ section and select the user role you wish to assign.
If you are working on your own site, then you will need to review user access. Create a new user account for your authors if required.
If there are older author and editor accounts that you will not be working with, then you need to edit those user accounts and change their email address and password. See our guide on how to disable user accounts without deleting them.
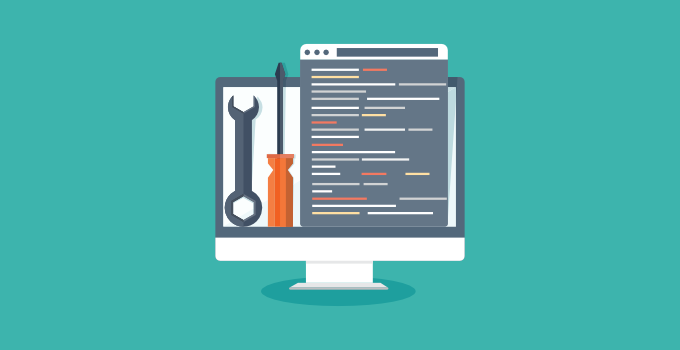
6. Run Security and Performance Scans
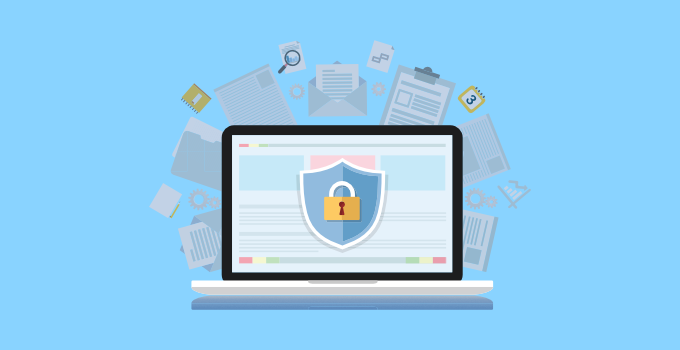
Next, you need to make sure that your new WordPress website is secure and performing well.
For security scans, we recommend using Sucuri. It is the best WordPress security plugin on the market and allows you to easily scan your website for malicious code, security threats, and vulnerabilities.
You can see our ultimate WordPress security guide for more details.
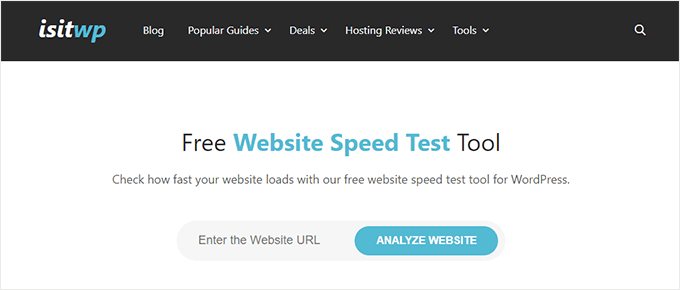
For performance, you can use any of the online website speed test tools. We recommend using the IsItWP website speed test tool, which is easy to use and gives you a detailed overview of your website speed.
It is also important that you check to see that caching is configured properly.
Many WordPress hosting companies like Bluehost and DreamHost offer built-in caching solutions that you can turn on from your hosting account. You can also use a WordPress caching plugin like WP Rocket to instantly improve your website speed.
If the site is not running a CDN, then you should consider using a CDN service. Although this is not required, we always recommend users to use a CDN. For more details, see our guide on why you should use CDN.
For more tips and tricks, you may want to see our ultimate guide to boosting WordPress speed & performance.
7. Check for Proper Tracking and SEO Integration
![]()
If you have inherited the ownership of a new website, then the old website owner may have transferred the Google Analytics property to you.
A lot of website owners simply add the Google Analytics code to their WordPress theme. This code disappears as soon as you update the theme or install a new one.
Make sure that Google Analytics is properly installed on the website by either using MonsterInsights or by adding the tracking code outside the WordPress theme.
Similarly, they may have also transferred Google Search Console property to you as well.
Make sure that your site has XML Sitemaps in place for the search console. You may also want to look at Google Search Console reports making sure there are no crawling issues or errors on the site.
We recommend using All in One SEO (AIOSEO) because it is the best SEO plugin for WordPress. You can easily optimize your site for search engines without hiring an expert.
8. Implement Version Control and/or a Staging Site
If you’re a developer, then it is highly recommended that you implement version control for the site. It is fairly easy to use GitHub or BitBucket.
If you’re not a developer, then at the very least we recommend setting up a WordPress staging site that ensures that you have a stable testing environment before pushing things live. We recommend this step for all users.
For those who’re scared to set this up, then Hostgator, a managed WordPress hosting provider, offers a robust staging environment and git version control integration.
Other small business hosting providers like DreamHost and Bluehost also offers to stage features at affordable prices.
9. Run a Website Clean up
Now that you have familiarized yourself with the project, it is best to clean out all the unnecessary things. Delete all inactive themes and plugins. Delete all user accounts that are not needed.
Log in to your WordPress database and optimize it. Some bad plugins leave their database tables even after they’re deleted. If you notice any of those, then it is best to delete them.
See our beginner’s guide to WordPress database management to safely optimize the WordPress database.
10. Review Plugin Settings

A typical WordPress website uses several plugins that may still be referring to old owners. If you have taken ownership of a website, then you would want to change that.
For example, the contact form plugin on the website may still be sending notifications to old email addresses. WordPress SEO plugin may still be pointing to previous owners’ social media profiles.
You can discover some of these things by looking at the website and testing all its features. You can also review plugin settings and update them if needed.
11. Upgrade Your Hosting Service
After running the website speed test, if your website is still slow despite using caching, then it is time to upgrade your hosting.
If it is a client website, then your performance tests should help you convince the client to move. If you own the website yourself, then you just need to choose the right web host.
We recommend using Dreamhos or Bluehost as they are one of the biggest hosting companies and officially recommended WordPress hosting providers.
If your website has outgrown shared hosting, then you may want to consider using a managed WordPress hosting service like hostgater.
See our guide on how to move WordPress to a new host for step-by-step instructions to move your website.
We hope that this article offered some insights on what you should do when inheriting a WordPress site. You may also want to see our guide on the best WooCommerce plugins and the ultimate WordPress SEO guide for beginners.