
Do you want to switch from Gumroad to WordPress?
Gumroad is an online marketplace where users can sell digital goods. From games to music to courses and videos, Gumroad used to be a good eCommerce platform for creators. However, many users are looking to switch from Gumroad to WordPress because they have raised their fees to 10% for each transaction.
In this article, we’ll show you how to switch from Gumroad to WordPress, so you can grow your online business without the Gumroad tax.

How To Switch From Gumroad to WordPress?
Gumroad is a popular eCommerce platform that allows users to sell digital goods online.
However, they now charge a 10% flat fee on each sale. This 10% does not include credit card processing or PayPal fees.
Plus, an additional 10% fee is charged if a product is sold through the ‘Gumroad Discover’ feature or their ‘Global Affiliates’ program. That’s a lot of fees.
On the other hand, WordPress is free and doesn’t charge you any fee for the items you sell.
Unlike Gumroad, WordPress gives you the freedom to sell anything online, including physical versions of your digital goods. Plus, you can use any payment gateway you want and promote your website freely.
To learn more, see our complete WordPress review with pros and cons.
Important: When we say WordPress, we are talking about WordPress.org aka self-hosted WordPress and not WordPress.com which is a hosting platform. For more details, please see our article on the difference between WordPress.com vs. WordPress.org.
That being said, here is a quick overview of the things we’ll cover to switch from Gumroad to WordPress.
Step 1. What Do You Need to Switch from Gumroad to WordPress?
You’ll need the following things to switch from Gumroad to WordPress.
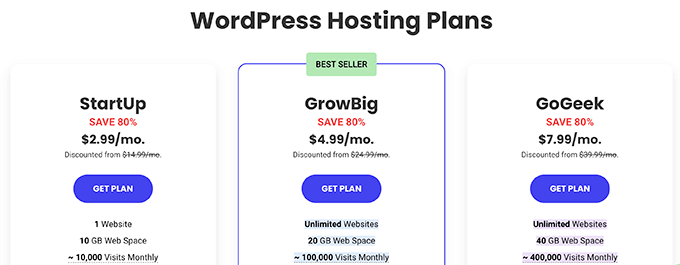
Luckily, the folks at Dreamhost have agreed to offer Wehavedigitaltool users a generous discount on eCommerce-ready hosting.
You can get started for $2.99 per month.
Let’s go ahead and walk through how to purchase your domain, web hosting, and SSL certificate.
First, you need to visit the Dreamhost website and choose a plan by clicking on the Get Plan button.
After that, Dreamhost will ask you to enter a domain name for your website.
You can look up a domain name or if you already have one then you can add that as well.
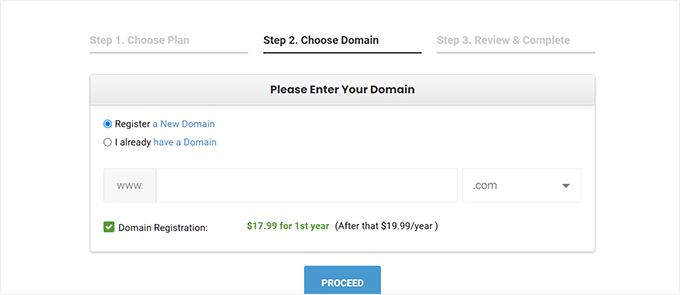
If you don’t already have a name in mind, then you can see our guide on how to choose the best domain name.
Lastly, you will need to add your account information. You will also be able to purchase some optional extras.
You can always add these extras at a later date if you decide that you need them. If you’re unsure then we recommend skipping this step.
You can now finish the setup by making the payment.
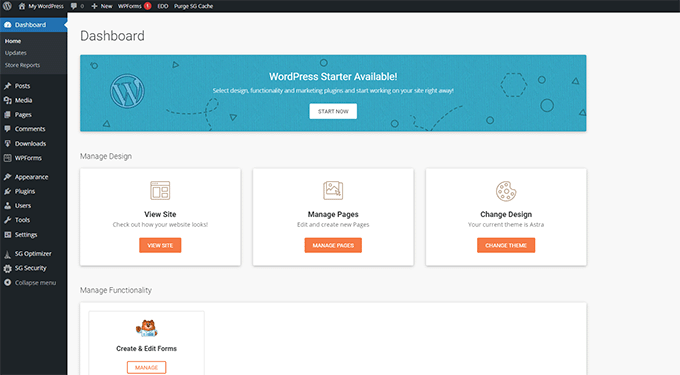
After that, you will get an email from SiteGround with a link to log in to your hosting account control panel.
From here, switch to the websites tab and click on the WordPress Admin button next to your website.
This will take you to the WordPress admin area of your website where you’ll notice Easy Digital Downloads pre-installed on your website.
Step 2. Setting up Your WordPress Website
By default, WordPress does not come with eCommerce shopping cart functionality.
If you followed our advice and signed up with SiteGround, then your WordPress site will now have Easy Digital Downloads installed which provides all the Gumroad features you’ll need to sell digital goods.
On the other hand, if you are using some other WordPress hosting provider, then you’ll need to install Easy Digital Downloads first.
Simply, install and activate the Easy Digital Downloads plugin. For more details, see our step-by-step guide on how to install a WordPress plugin.
Note: For the sake of this tutorial, we are using the free version of Easy Digital Downloads. There is also a premium version that comes with additional features and priority support.
Upon activation, you need to visit the Downloads » Settings page in your WordPress admin area to set up your store.
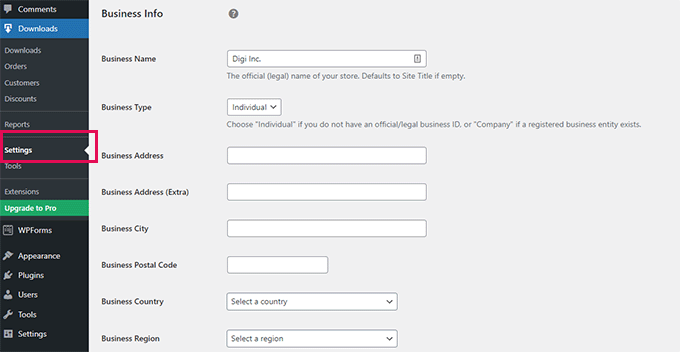
First, you need to provide a business name and type.
After that, enter your business address and country. This information is used for calculating taxes.
Finally, click on the ‘Save changes button to store your settings.
Next, you need to switch to the ‘Currency’ tab and select the default currency you want to use on your store.
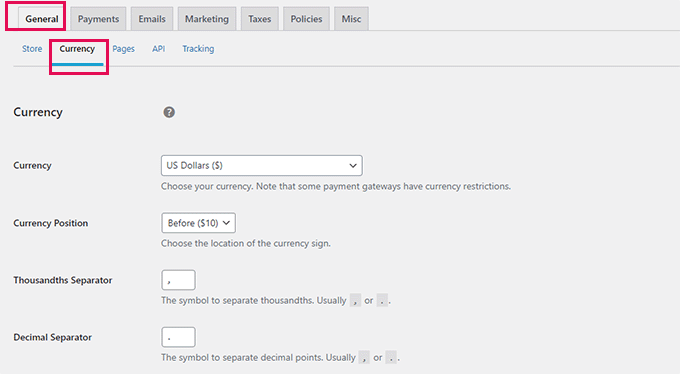
Don’t forget to Save your changes to store your settings.
Step 3. Setting up Payment Gateway