
Do you want to add content upgrades in WordPress to help grow your email list?
Content upgrades are specific perk content that your compendiums can get by subscribing up for your email list.
In this composition, we ’ll show you how to add content upgrades in WordPress and grow your email list.

Table of Contents
What is a Content Upgrade? how to add content upgrades in WordPress and grow your email list?
Content upgrades are where you offer your compendiums exclusive perk content for subscribing up to your Email list. This fresh decoration content offered for completing an action is also known as a content fix.
What are some content upgrade ideas?
- eBooks
- Checklists
- Excel Worksheets
- Downloadable PDF version of your blog post
- Exclusive video interview related to the post
- Bonus how-to’s for the article


Basically content upgrades have to be highly relevant to the post you’re offering it on.
For illustration, on a post about content upgrades, we should offer a content upgrade canon because compendiums of this post will find that largely useful.
Mortal psychology plays an important part in the effectiveness of content upgrades.
The psychology principle known as Zeigarnik Effect states that people are most likely to complete a task if they initiate it themselves.
For content upgrades, it works because addicts initiate it by clicking on a link or an image. This makes them more likely to complete the task by finishing the sign-up.
Sounds too good to be true, right?
. For illustration, on a post about content upgrades, we should offer a content upgrade canon because compendiums of this post will find that largely useful.
Mortal psychology plays an important part in the effectiveness of content upgrades.
The psychology principle known as Zeigarnik Effect states that people are most likely to complete a task if they initiate it themselves.
For content upgrades, it works because addicts initiate it by clicking on a link or an image. This makes them more likely to complete the task by finishing the sign-up.
Sounds too good to be true, right?
.
See these stats from Syed’s website comparing a regular popup and a MonsterLinks™ content upgrade.
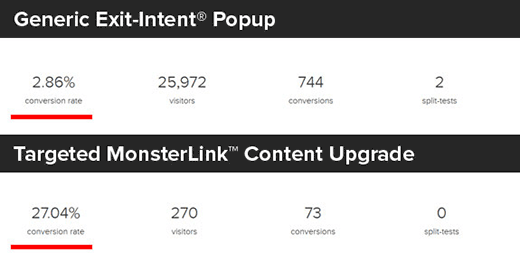
The general popup was running across the point and was seen by near druggies, out of which 744 inked up.
On the other hand, the targeted MonsterLink ™ was placed on a single runner. It was viewed by 270 people and 74 druggies inked up. That’s an insane conversion all from a single runner without running any split- tests!
Now that you know what a content upgrade is, let’s see how you can use it on your own website to get further dispatch subscribers.
How to Add Content Upgrades in WordPress?
The easiest way to add content upgrades to WordPress is using OptinMonster. It’s one of the best WordPress lead generation plugins in the market used by over 1.2 million sites.
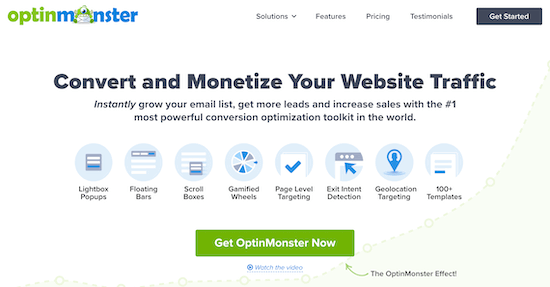
It allows you to add beautiful opt in forms like lightbox popups, scroll-triggered slide-in forms, floating bars, sidebar optins, below the content forms, and more.
It is super fast and works beautifully with WordPress powered websites.
Note: I am started OptinMonster to use on Wehavedigialtool, and we increased our email subscribers by 600%.
Adding content upgrades is a breeze with the MonsterLinks™ feature in OptinMonster.
If you don’t have an email list, then check out our guide on why you should start building your email list right away.
Step 1: Setting up OptinMonster
First you will need to install and activate the OptinMonster plugin on your WordPress site.
This plugin acts as a connector between your WordPress website and OptinMonster.
Upon activation, click on OptinMonster menu item in your WordPress admin bar.
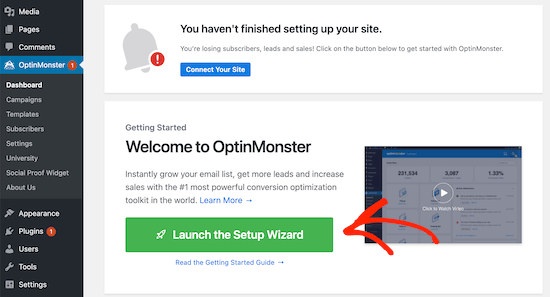
Now you’ll need to connect your site to OptinMonster by clicking ‘Launch the Setup Wizard’.
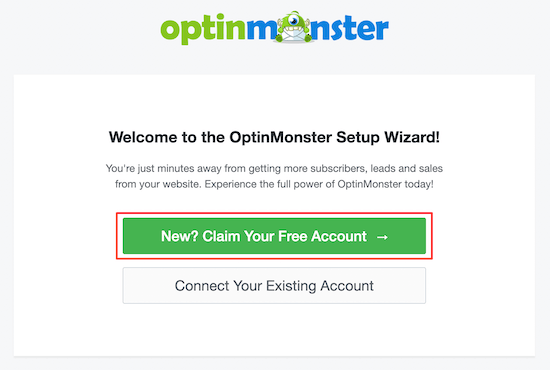
Next, you’ll be prompted to connect to an existing account, or claim your free account.
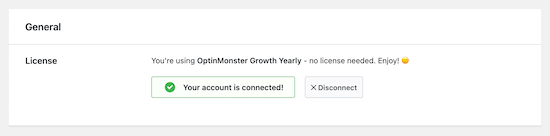
Once you’ve finished going through the setup wizard your WordPress site will be connected to OptinMonster.
You can navigate to OptinMonster » Settings to double check that you’re connected.
Step 2: Create a New Popup Optin
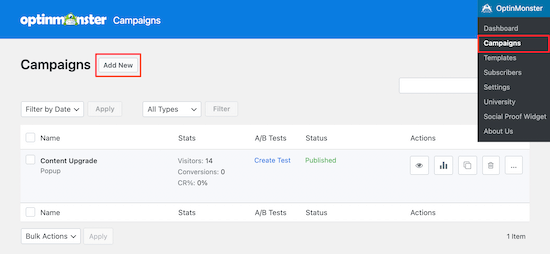
Once you are successfully connected, navigate to OptinMonster » Campaigns.
Then click the ‘Add New’ button to create a new campaign.
After that, you’ll need to select the Campaign Type, in this case it’s ‘Popup’.
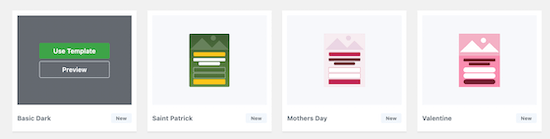
Then, you can choose a popup template.

Just hover over the template you like and click ‘Use Template’.
This will be the foundation for your popup design.
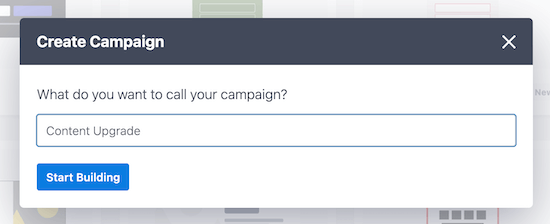
Once you’ve done that enter your campaign name in the ‘Create Campaign’ popup and click ‘Start Building’.
The name of your campaign is to help you remember, it won’t appear in your design.
This will open up the OptinMonster app where you can completely customize the appearance of your popup.
You can change nearly every part of your design including your background and fountain colors, textbook, subscribe button, and more.
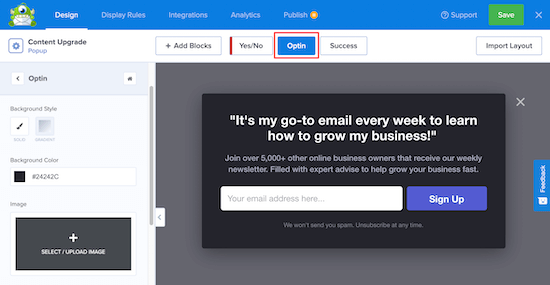
After you’re happy with your design click on the ‘Display Rules’ tab.
This is where we’ll set your content upgrade display options.

First, we ’ll set the conditions for when the popup will appear. To do this click type‘MonsterLink’into the‘Search Display Rules’ quest bar.
Also, click on‘MonsterLink ™ (On Click)’to add the rule. After that, click‘ Coming Step’.
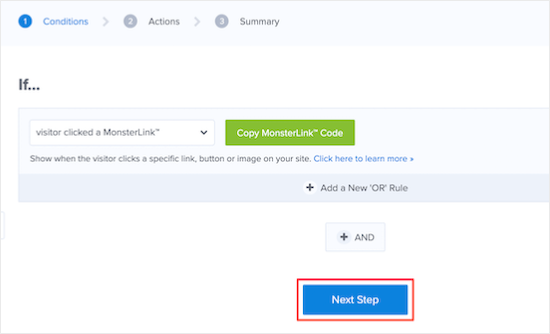
You can leave the dereliction options on the coming screen. But, feel free to add an vitality effect or sound effect to the popup. Once you ’re finished click‘ Coming Step’.
On the‘Summary’ runner you ’ll need to click the‘Copy MonsterLink ™ Code’.
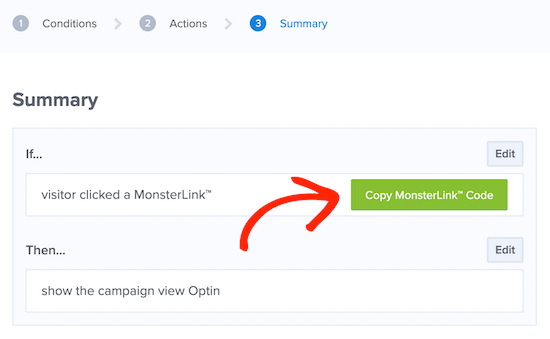
Now you need to open a plain textbook editor like Notepad and bury the law you copied. You’ll need this law latterly.
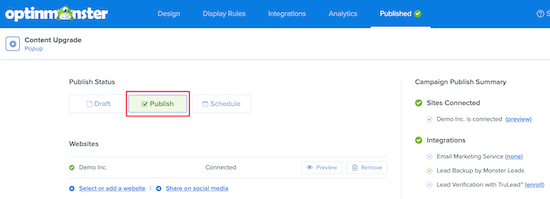
After that navigate to the‘Publish’ tab and switch the‘Publish Status’from Draft to Publish. Also, you can click‘ Save’and exit the screen.
Step 3: Enable MonsterLink™ Optin on Your Site
Once you exit the form builder screen, it ’ll take you to the‘WordPress Affair Settings’ screen.
Then you can set which runners and posts you want MonsterLink ™ to work on. You can leave the dereliction settings. But, make sure the status is changed to Published under the‘Visibility & Status’box.
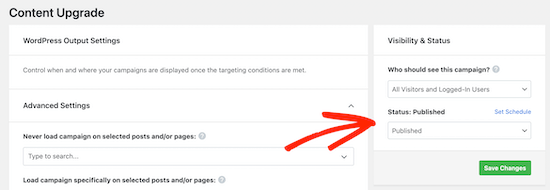
If you do make any changes, make sure you click ‘Save Changes’
Step 4: Add Your Monster Link in a WordPress Post or Page
Adding your MonsterLink ™ in WordPress is veritably simple.
Simply edit the post or runner where you want to display MonsterLink.
On the post edit screen, switch to the textbook editor and bury the MonsterLink ™ law you copied before.
It’ll look like this
<a href=”https://app.monstercampaigns.com/c/your-code/” target=”_blank” rel=”noopener noreferrer”>Subscribe Now!</a>
This code will show plain link to the users however it won’t really stand out.
So how do you make it stand out? You can add a box around it like this:
|
1
2
3
4
5
|
<p style="background: none repeat scroll 0 0 #fffecf; clear: both; margin-bottom: 18px; overflow: hidden; border: 1px solid #e5e597; padding: 13px;"><strong>Exclusive Bonus:</strong> <a href="https://app.monstercampaigns.com/c/your-code/“ target="_blank" rel="noopener noreferrer">Download The Blog Post Checklist</a> to use before you hit publish.</p> |
You can also create a shortcode to make the box styling easy in the future.
Simply add this code in your theme’s functions.php file, in a site-specific plugin, or by using the code snippets plugin:
|
1
2
3
4
|
function wpb_make_yellowbox($atts, $content = null) { return '<p style="background: none repeat scroll 0 0 #fffecf; clear: both; margin-bottom: 18px; overflow: hidden; border: 1px solid #e5e597; padding: 13px;">' . do_shortcode($content) . '</p>';}add_shortcode('yellowbox', 'wpb_make_yellowbox'); |
You can now add your content upgrade link in your WordPress posts using the shortcode like this:
|
1
2
3
4
5
|
[yellowbox]<strong>Exclusive Bonus:</strong> <a href="https://app.monstercampaigns.com/c/your-code/“ target="_blank" rel="noopener noreferrer">Download The Blog Post Checklist</a> to use before you hit publish.[/yellowbox] |
You can also show the link with an image. This way you can make it much more prominent and attractive.
Here is how you can add the image with MonsterLink™ in WordPress.
|
1
|
<a href="https://app.monstercampaigns.com/c/your-code/“ target="_blank" rel="noopener noreferrer"><img src="http://example.com/wp-content/uploads/2021/03/ebookdownload.png" alt="ebook download" /></a> |

Step 5: Delivering the Content Upgrade in WordPress
Now we need to take a look at how to deliver the content upgrade that we promised to the stoner.
Your content upgrade could be anything. You can use PDF, videotape, audio, or any other kind of content.
Once druggies enter their dispatch address, you can give them the promised content upgrade. There are multiple ways to do this
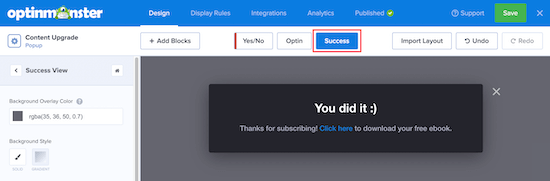
Show Download Link as Success Message
You can show a download link as a success communication inside your popup.
Edit your option in the OptinMonster form builder and click on the‘Success’ tab.
Also, edit your success communication textbook and include a URL to your downloadable content upgrade.
Redirect to Thank You or Download Page
You can also deflect druggies to a thank you runner that has the link to download the train. To do this you ’ll need to be on the‘Success’ tab.
Next, we ’ll add a button that says‘Download Now’.
After that click‘Action’and elect‘ Deflect to a URL’from the drop-down list.
Also, enter the URL in the‘ Deflect URL’box.
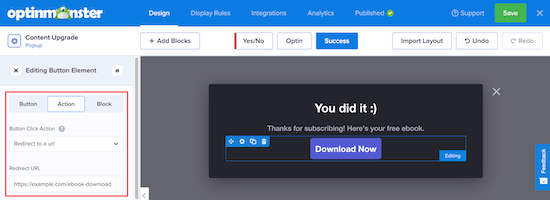
Make sure you click ‘Save’ to save any changes you’ve made so far.
Send as an Email
Utmost Email marketing software providers offer autoresponder features where you can shoot welcome emails to new druggies. You can use it to shoot the download link to the stoner.
You’ll have to check your dispatch service provider’s attestation section for instructions on how to do this. OptinMonster offers a wide range of integrations with the most popular dispatch marketing tools.
Conclusion
Content upgrades aren’t as popular as they formerly were. But, they’re still an extremely effective way to induce leads and grow your dispatch list.
Brian Dean from Backlinko, Bryan Harris from Videofruit, Neil Patel from QuickSprout, Pat Flynn from SPI, and of course our own Syed Balkhi have seen phenomenal results from using content upgrades.
Still, also you should surely try out content upgrades If you’re serious about growing your dispatch list. It’ll take you anywhere from 30 twinkles to1.5 hours to make and add a content upgrade to your post, but it’s completely worth it.
We hope this article helped you add content upgrades in WordPress to grow your email list. You may also want to take a look at our guide on how to build an email list in WordPress and our list of 17 ways to grow your email list faster.