
Do you want to create a custom landing page on your WordPress site?
A landing page is a highly optimized marketing page. It helps businesses convert website visitors into customers and leads.
In this article, we’ll show you how to easily create a landing page in WordPress.

Here is a quick overview of what we’ll cover in this guide.
What is a Landing Page? how to easily create a landing page in WordPress
A landing page may be a purpose-built page designed to extend sales or generate leads for a business.
They are widely utilized in paid marketing, email, and social media campaigns. Users coming from these sources will land on this page first, which is why it’s called a landing page.
What is the difference between the homepage and a landing page?
A homepage is your website’s front page and what users will see once they enter your name in their browser. On the opposite hand, a landing page is often a standalone page where most visitors land from paid or third-party traffic sources.
Your website’s homepage is meant for visitors to interact together with your website, explore other pages, browse products, or check in. It has more links and provides users with more choices.
On the other hand, a landing page called a “squeeze page” is built for higher conversion rates. It has fewer links and is meant for users to form a purchasing decision or give their information for future outreach.
Your website can have only one homepage, but you can create as many landing pages as you want for different campaigns. For example:
- A landing page for your paid advertising campaigns
- A page for subscribers coming from your email list, visitors from social media, and more
- Users landing on a specific product or service page
- and many more…
That being said, let’s take a look at how to create a beautiful custom landing page in WordPress without needing any CSS, HTML, or PHP know-how.
We’ve chosen the highest three solutions for creating landing pages in WordPress. These landing page builders are easy to use, optimized for speed, and affordable for little businesses. You can pick the answer that most closely fits your need.
Ready? Let’s get started with the first method.
Method 1. Creating a WordPress Landing Page using SeedProd
This method is the easiest and recommended for all users.
For this method, we’ll be using SeedProd. It is the simplest WordPress landing page plugin on the market and allows you to make any sort of landing page with no coding required. SeedProd is additionally optimized to be lightweight, fast, and SEO-friendly.
First, you need to install and activate the SeedProd plugin. For more details, see our step-by-step guide on how to install a WordPress plugin.
Note: There is a free version of the SeedProd plugin available on WordPress.org, but we will be using the Pro version since it offers more powerful features.
Upon activation, you’ll be asked to enter your license key. You can find this information under your account on the SeedProd website.

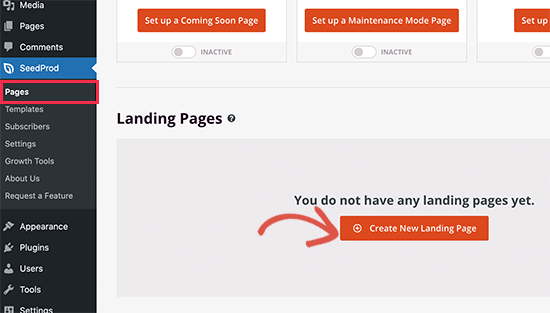
Next, you need to visit SeedProd » Pages page and click on the ‘Add New Landing Page’ button.
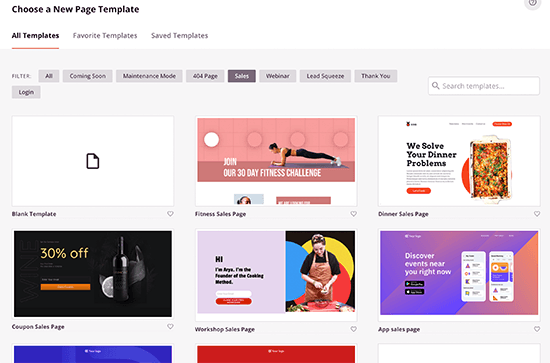
On the next screen, you’ll be asked to choose a landing page theme.
SeedProd comes with dozens of beautiful landing page templates neatly organized for different campaign types. Simply click to select a template that you want to use as a starting point.
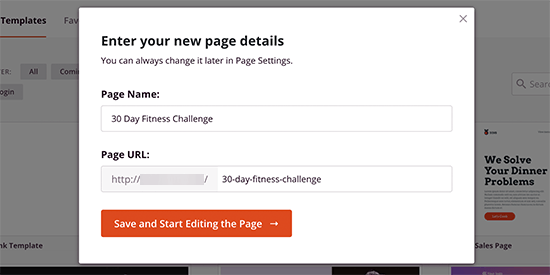
You’ll be asked to provide a title for your page and choose a URL. Choose a catchy page title and don’t forget to add your target keyword in the page URL.
This will load the SeedProd page builder interface. This simple drag and drop builder will show a live preview of your page to the right and a toolbar on the left.
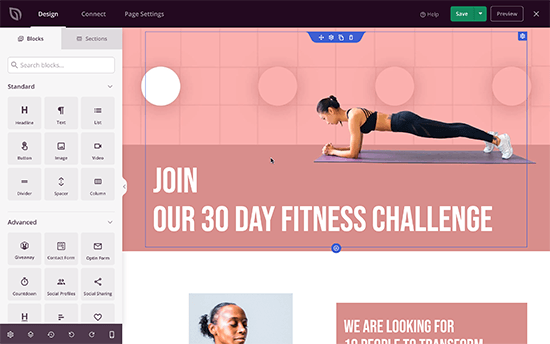
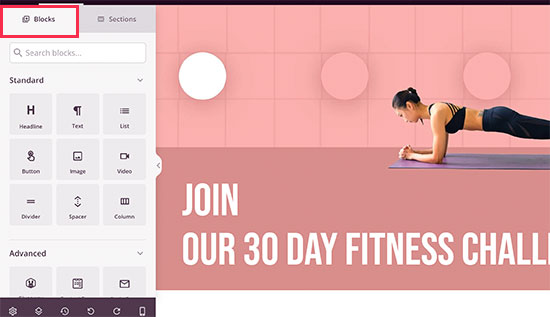
Blocks are the core design tool in SeedProd. You can use them to make any layout you would like. You can also use columns to put blocks side by side.
You can simply point and click on on any block on the page to customize it. You can also drag and drop blocks to move them up or down.
You can add new blocks to your page from the left column. SeedProd comes with popular landing page design elements that you simply simply can simply drag and drop anywhere on your page.
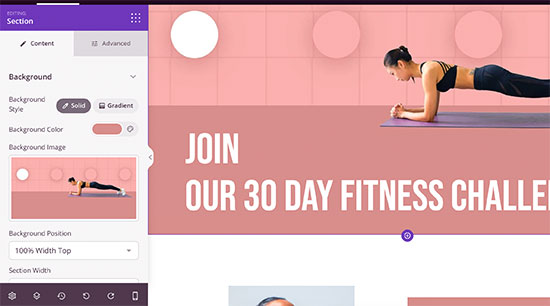
You can also change background colors, add background images, change colors and fonts to match your brand or theme.
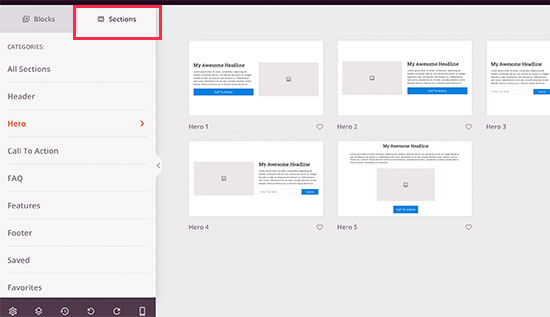
Plus, SeedProd comes with ‘Sections’ too. These are common design areas used by landing pages. For instance, header, hero image, call to action, testimonials, contact form, FAQs, features, footer, and more.
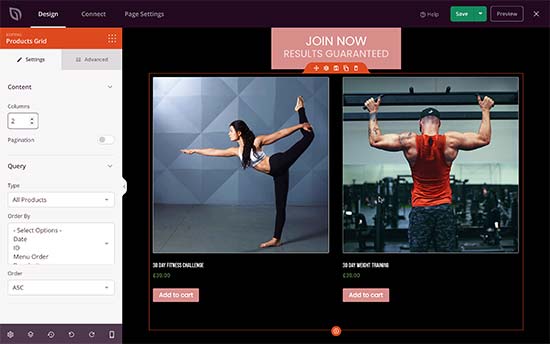
SeedProd is also compatible with WooCommerce. This allows you to make product landing pages, eCommerce landing pages, promotional pages for sales, and other events.
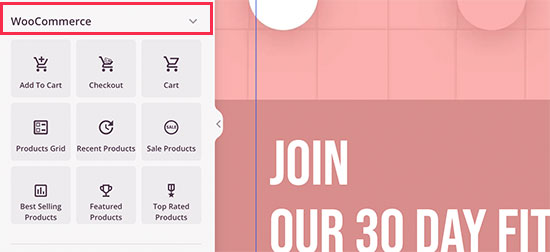
WooCommerce blocks include add to cart button, checkout, featured products, products grid, and more. This enables you to create truly stunning marketing campaigns without limiting yourself to your WooCommerce theme.
Connecting Your Landing Pages to Third-Party Tools
To create a good landing page for lead generation, you can add email list sign-up forms where users can join your newsletter or provide their contact information.
SeedProd makes it super easy to connect your landing pages to popular email marketing services like Aweber or mailpoet. Simply switch to the ‘Connect’ tab and then select your email service provider.
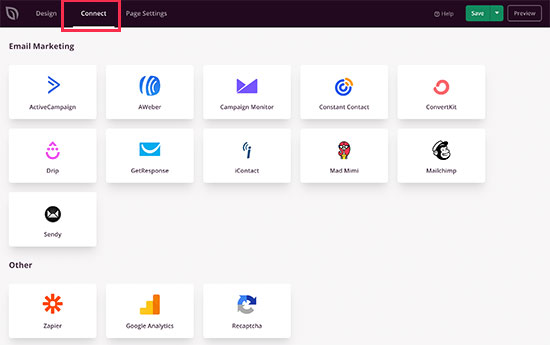
Need to connect to a service not listed there? Don’t worry, SeedProd works with Zapier which acts as a bridge between SeedProd and more than 3000+ other apps on Zapier.

Saving and Publishing Your Landing Page
Once you are done editing your page you can simply click on the Save button and then choose Publish.

Publishing your landing page will make it go live on your website.

Using a Custom Domain for Your Landing Page
Do you have a custom domain that you simply want to use for your landing page?
This allows you to use your WordPress website to make landing pages, coming soon pages, product pages, geo-targeted ad campaigns, microsites, and more with their own domain names.
Instead of creating a WordPress multisite network or installing multiple WordPress websites, you’ll simply make a landing page and point it to your custom name.
Simply switch to the Page Settings tab then click on the ‘Custom Domain’ section.
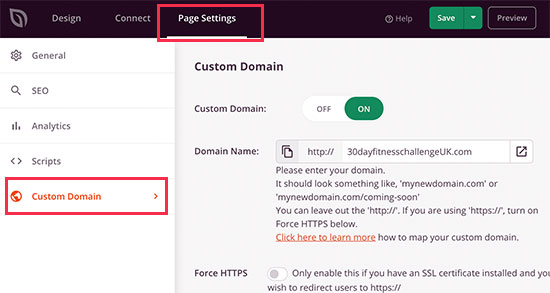
Make sure that your WordPress hosting provider allows you to use multiple domains, and you have added the domain name to your hosting dashboard.
For more details see our article on how to add a custom domain alias for your WordPress landing page.
Method 2. Creating a Landing Page in WordPress using Beaver Builder
Beaver Builder is another popular drag & drop WordPress page builder. It allows you to easily create a landing page using ready-made templates that you simply simply can modify with simple drag and drop tools.
First, you would like to try to do is install and activate the Beaver Builder plugin. For more details, see our step-by-step guide on the way to install a WordPress plugin.
Upon activation, you would like to go to the Settings » Beaver Builder page to configure plugin settings.
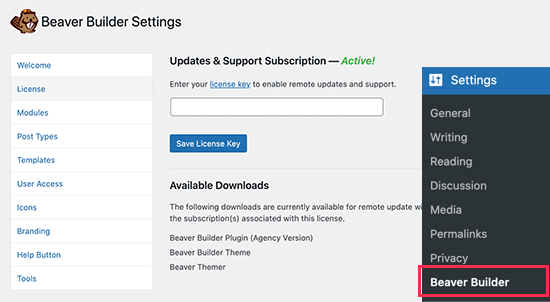
Under the License tab, click on the ‘Enter License Key’ button to feature your license key. You can find this information under your account on the Beaver Builder website.
Next, you would like to go over to Pages » Add New page from the WordPress dashboard to make your first landing page.
Beaver Builder works with all top WordPress themes. Many of those themes accompany a landing page template designed to figure with page builder plugins. Typically, they’re wide layouts with no sidebar and widgets.
If your theme doesn’t have such a template, then you’ll create one on your own employing a child theme. For detailed instructions, see our guide on the way to create a full-width page in WordPress.
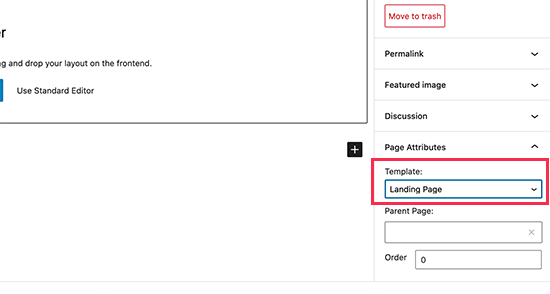
Select a landing page or full-width template from the ‘Page Attributes’ box up the proper column and now save your page to use the changes.
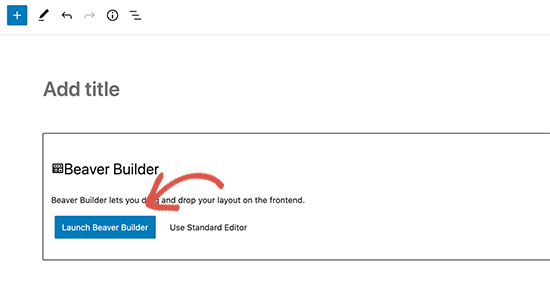
You are now ready to make a landing page.
Click on the ‘Launch Beaver Builder’ button in the post editor to launch the builder interface.
Beaver Builder will open with your theme’s landing page template. You need to click on the add button on the top right corner of the screen and switch to the Templates tab.
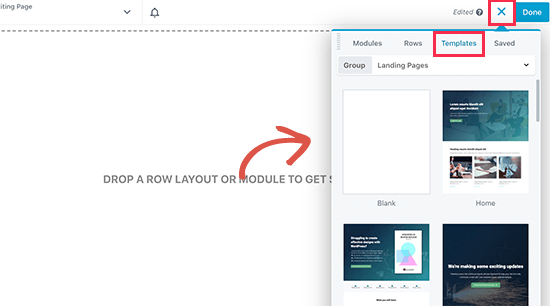
Here, you’ll find several ready-made templates to choose from. Select ‘Landing Pages’ from the group drop-down menu and then choose a template that looks close to what you have in your mind.
Once you select a template, Beaver Builder will load it in the preview window.
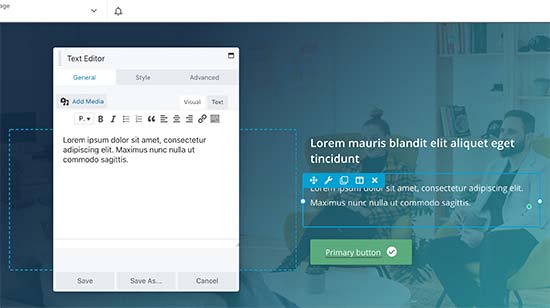
You can now point and click on any page content to edit it. You can change the text, change background color or images, adjust the width and height of the rows and columns.
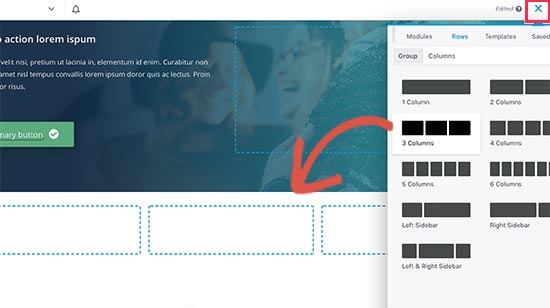
You can add or remove content items from your template. Simply click on the add button and switch to the rows tab. You can add either single or multiple columns.
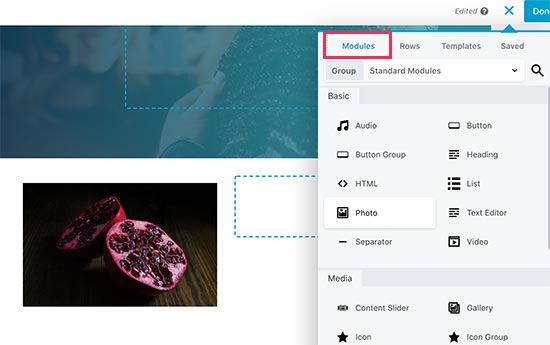
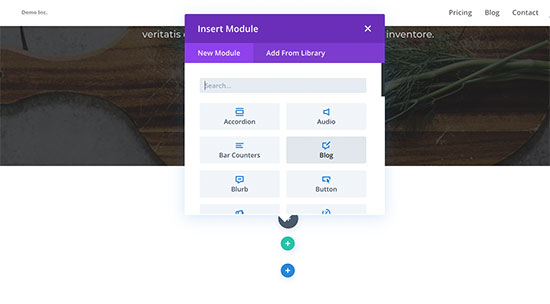
After adding a row, switch to the modules tab. Modules are content elements that you can add to your landing page. Beaver builder comes with all the essential modules including text, headings, CTA buttons, video, audio, animated countdown timer, and more.
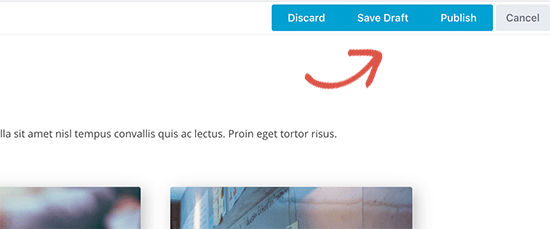
Once you are satisfied with the design, you can click on the ‘Done button at the top and then save or publish your page.
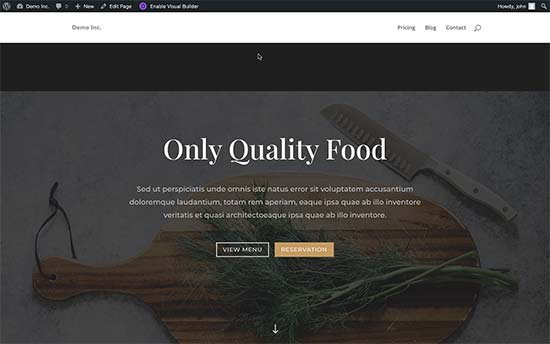
You can now visit the page to view your landing page in action. Feel free to edit it again if you need to adjust, add, or remove anything.

Method 3. Creating a Landing Page in WordPress using Divi
Divi may be a popular WordPress page builder plugin by the team behind Elegant Themes. It comes as a topic with page builder support, and you’ll also use it as a standalone page builder.
First, the thing you need to do is install and activate the Divi Builder plugin.
Note: If you are installing the Divi theme then you don’t need to install the page builder plugin. Simply follow our instructions on how to install a WordPress theme.
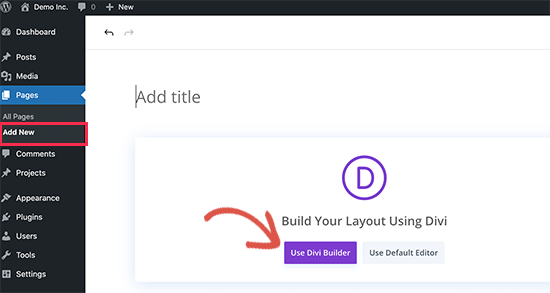
Upon activation, you can go to Pages » Add New page to create your landing page. On the page edit screen, click on the ‘Use Divi Builder’ button to launch the Divi page builder.
Next, you will see a welcome popup to familiarize yourself with the editor, you can exit it by clicking on the Start Building button.
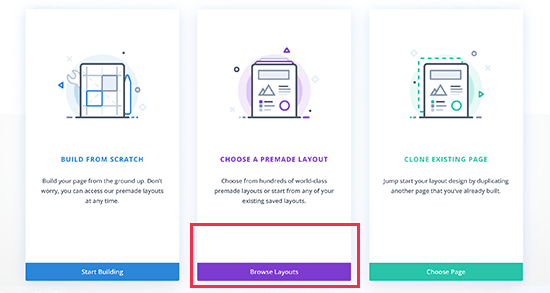
After that, you’ll see the option to start from scratch, choose a layout, or clone a page. You need to click on the choose a layout button.
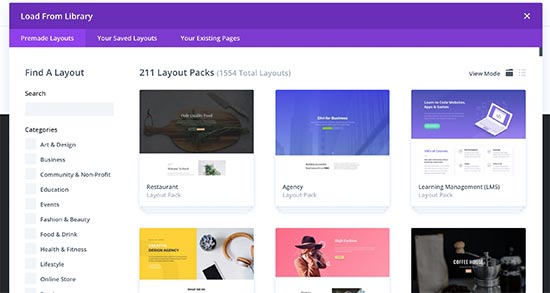
Divi comes with dozens of ready-to-use landing page templates organized by categories. Simply click to choose a template that you want to use as a starting point.
On the next screen, you’ll see layout details and other templates it includes. Most layout packs will include a landing page template that you can use.
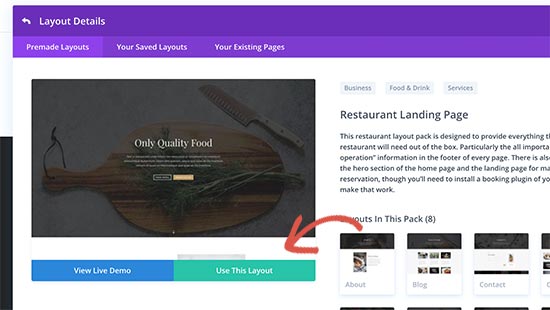
Simply click on the ‘Use this layout’ button to continue.
You may be asked to supply your Divi account username and API key. You can find this information under your account on the Elegant Themes website.
Divi would now fetch and install your selected layout from the library. After that, you’ll see a live preview of your page inside the page builder.
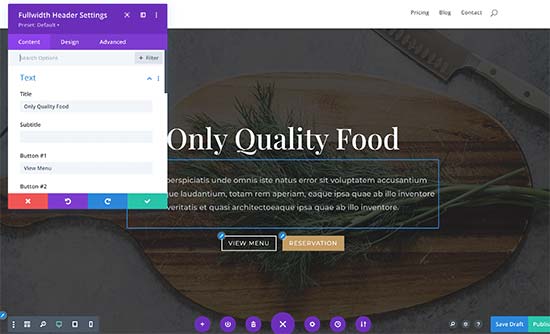
You can simply point and click to select and edit elements on the screen. For text elements, you can simply place the cursor over the text you want to edit and start typing.
For other elements, you’ll see a popup appear on the screen with options to try different customizations.
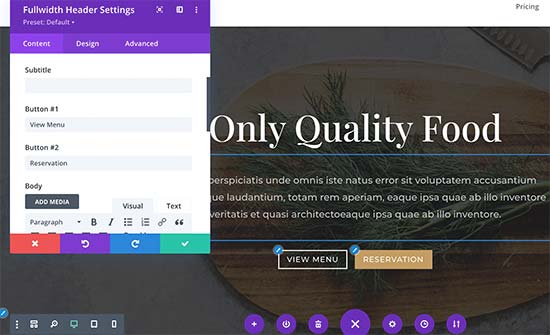
Divi uses sections, rows, and modules to build layouts. You can add a section, row, or module by clicking on the + icon anywhere on the page.
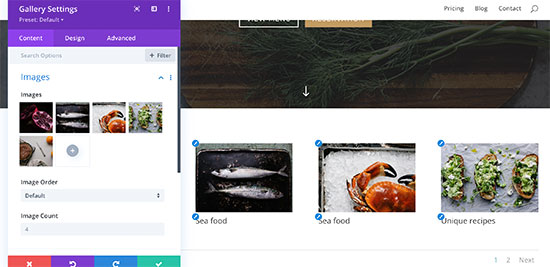
Each module comes with different settings that you can customize after inserting it. Divi comes with lots of advanced options for each element.
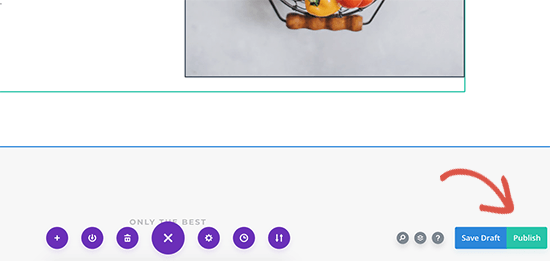
Once you are done editing, you can simply click on the Publish button at the bottom right corner of the screen.
You can now click on the Exit Visual Builder button in the WordPress admin toolbar to exit the editor.
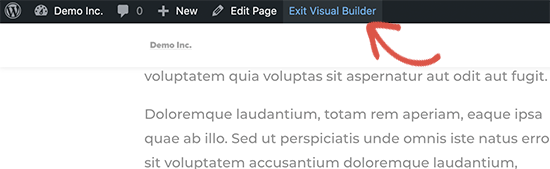
The builder will now redirect you back to the live version of your landing page. You can still resume editing by clicking on the ‘Enable Visual Editor’ in the toolbar at the top.
We hope this article helped you learn how to create a landing page with WordPress. You may also want to see our proven tips on driving more traffic to your WordPress site, or our comparison of the best business phone services to optimize your sales conversion.
Note: To help our readers avoid choice paralysis, our article does not include all landing page builders like Elementor, Leadpages, Instapage, Unbounce, ClickFunnels, etc. The top three solutions we have picked are the best solutions for small businesses because they are easy to use, optimized for speed, and affordable for small businesses.