
Interested in learning how to install WordPress on Google Cloud?
Unmatched scalability is provided by cloud hosting companies. Cloud servers are flexible and can handle high-traffic spikes, and you often pay by the hour, so you can track exactly where your money is going.
In this essay, we’ll go through how hosting WordPress on Google Cloud can be advantageous. After discussing costs, we’ll walk you through installing WordPress on Google Cloud.
Let’s start now!
Table of Contents
Why you should install WordPress on Google Cloud
You may host your website or application on the data centers of the search engine giant thanks to a group of services called Google Cloud. You can access this hardware using Google Cloud as virtual machines (VMs).
Cloud hosting services, as opposed to standard VMs or virtual private servers (VPS), use a network of machines to store your data. Because of its enormous scalability, we refer to it as the “cloud.” Your cloud is perfect for projects that require a high level of performance since you can always add more resources to it.
You receive all the typical benefits of cloud hosting with Google Cloud, plus more. As you might expect, Google Cloud uses the best infrastructure, which makes it a strong – and pricey – alternative.
The costs of using Google Cloud
You probably have some concept of the cost of hosting unless you’re new to owning a website. If you sign a long enough contract, you can currently find some good hosting services starting at less than $5 per month.
You should not be surprised to receive shared servers at this price point. Unmanaged VPSs are also available, with prices starting at under $10, although they often require some knowledge of server administration.
Like various VPS hosting companies, Google Cloud has a pricing plan. You are billed hourly for the resources you utilize. As an illustration, the cost of operating a typical 1 CPU computer with 4 GB of RAM is $0.0475 per hour or $24.2725 per month.
You are already competing with numerous managed WordPress site providers at this price point. There is a significant distinction, though. Managed hosting frequently offer a relatively hands-off experience by handling all complex configuration on your behalf. On the other side, Google Cloud gives you total control over your cloud.
If you know how to set up your PC, you can also use Google Cloud at significant savings. Additionally, you can receive free credits simply for signing up; we’ll go through this in the section after that.
How to install WordPress on Google Cloud (in 3 steps)
Learning how to install WordPress on Google Cloud is a bit more involved than with other web hosts. However, it’s not as intimidating as it might seem. Let’s jump right in!
Step 1: Deploy a WordPress instance
Prior to doing anything else, you must register for Google Cloud. Your account should be set up in a matter of minutes. We advise using your bank or credit card to confirm the account once you have access to your console.
When you sign up for a free trial of Google Cloud’s services, they will give you $300 worth of credits to use on your projects just for authenticating your account:

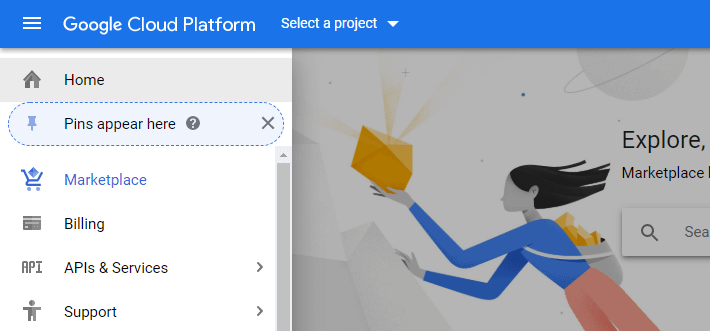
The remainder of the process is much the same whether you decide to sign up for a free trial or not. In order to start a new project, go to your dashboard, open the menu on the left, and choose the Marketplace option:
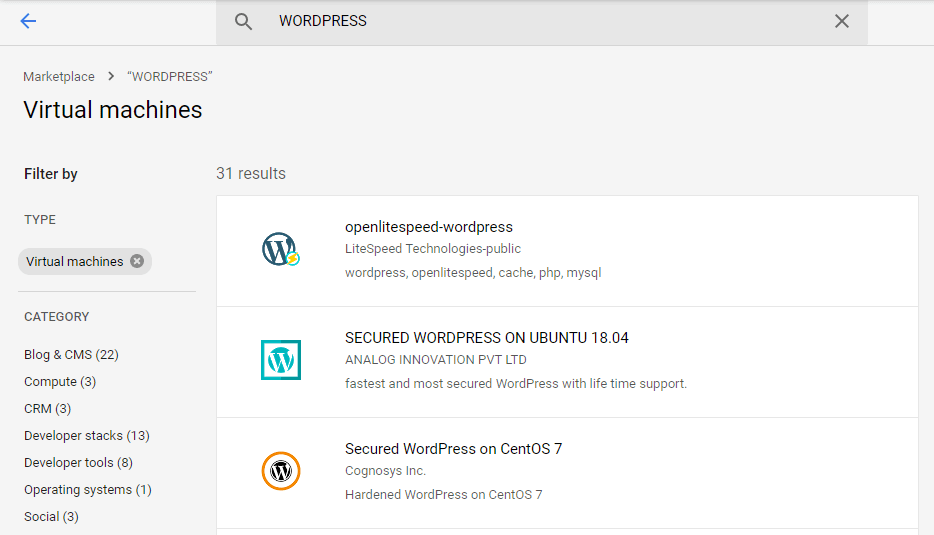
You may find a list of ready-to-deploy WordPress configurations on the following page by searching for “WordPress” using the search feature.
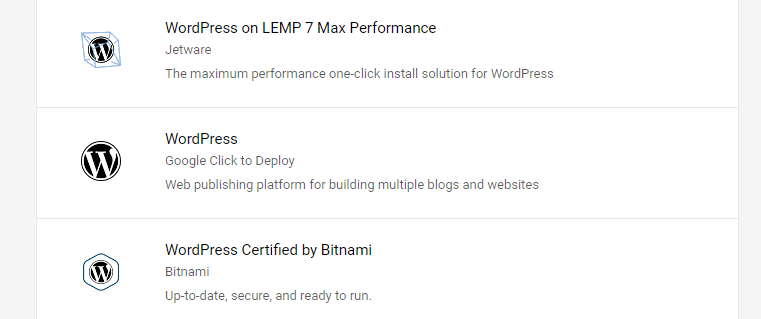
Scroll down until you find the WordPress option with Google Click to Deploy as its subtitle:
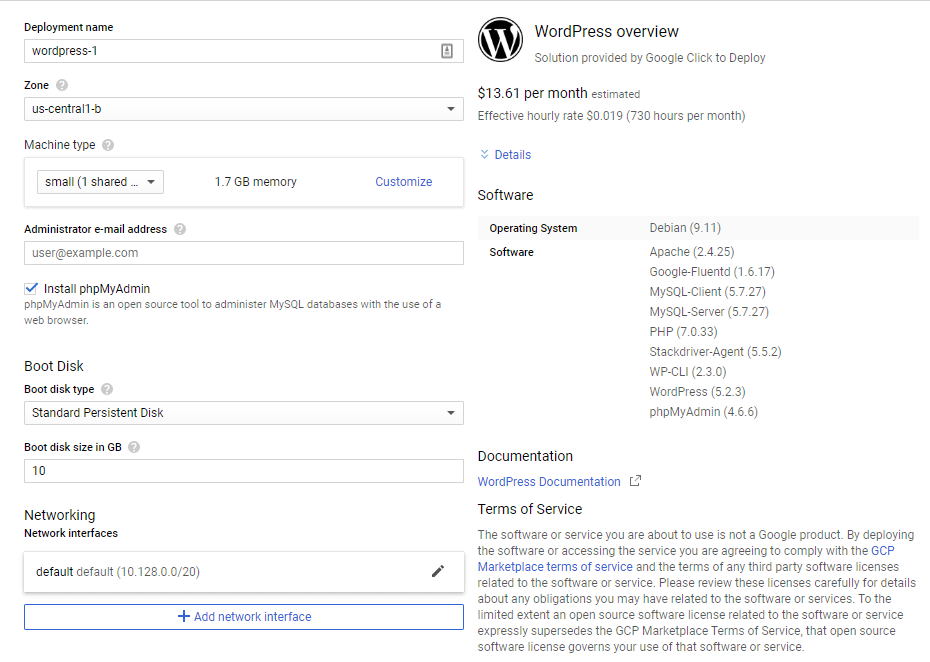
Once you select this, you’ll get an overview of estimated costs and what stack the package uses:
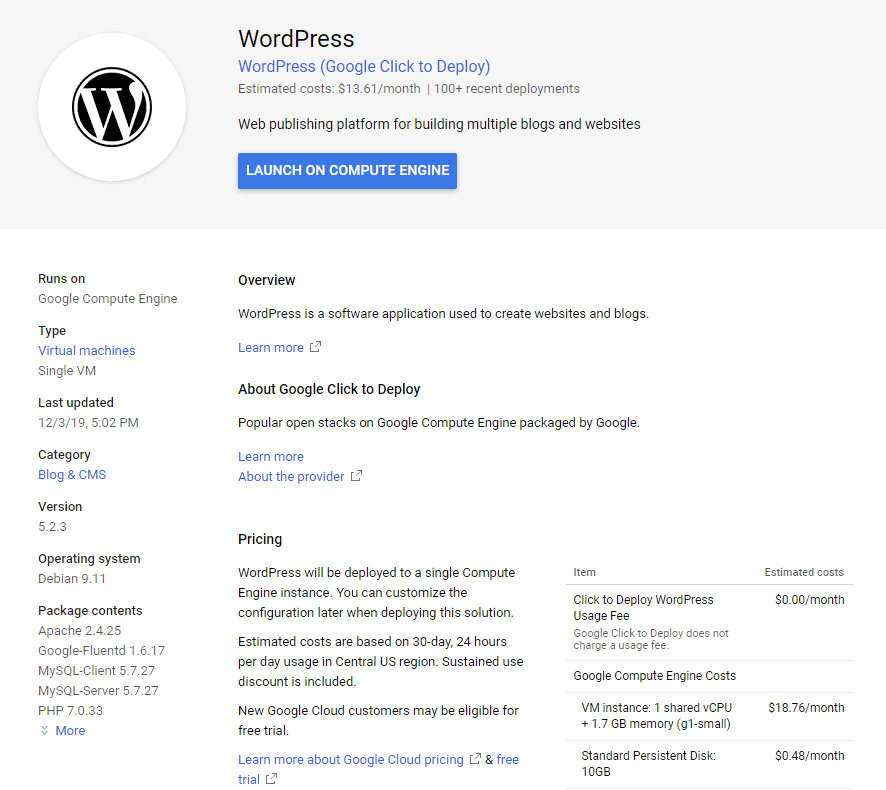
You receive 1 CPU and 2 GB of RAM with this stack, which is anticipated to cost around $13.61 per month (you receive reductions for each month of full utilisation). This also comes with 10 GB of storage, which is plenty to run a website with modest traffic without any issues.
When you’re ready, click on LAUNCH ON COMPUTE ENGINE, then proceed to configure your setup.
Step 2: Create and configure your new project
Next up, Google Cloud will ask you to select a name for your new project:
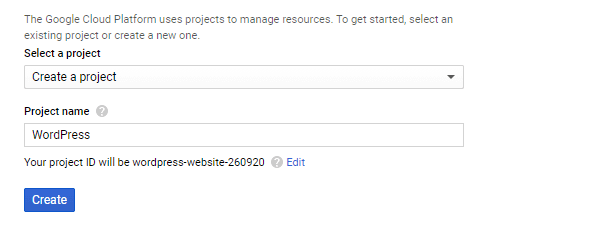
Give the service some time to set everything up when you click the Create button.
You have the opportunity to make changes to your new Google Cloud instance setup while you wait.
You saw some expense projections in the last section. You now have the option to alter every setting, which may result in an increase or decrease in prices.
You shouldn’t use less than 2 GB of RAM for your cloud instance as a general guideline. Additionally, a shared CPU is used in this setup’s default configuration. We advise setting the Machine type to 1vCPU, which has 3.75 GB of memory if performance is an issue.

With this configuration, your monthly expenses rise to $24.75 before discounts. Additionally, for better speed, we advise switching the boot disc type from Standard Persistent Disc to SSD Persistent Disc:

For the majority of websites, the default 10 GB of storage should be adequate. Your estimate should increase to roughly $25.97 per month with this configuration.
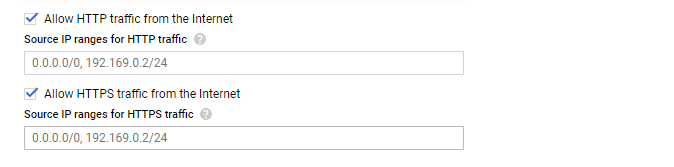
Before you proceed, make sure to:
Press the Deploy option right away, and then wait until Google Cloud completes its task, which could take a few minutes. When everything is prepared, visit the deployment page to view your new installation credentials:
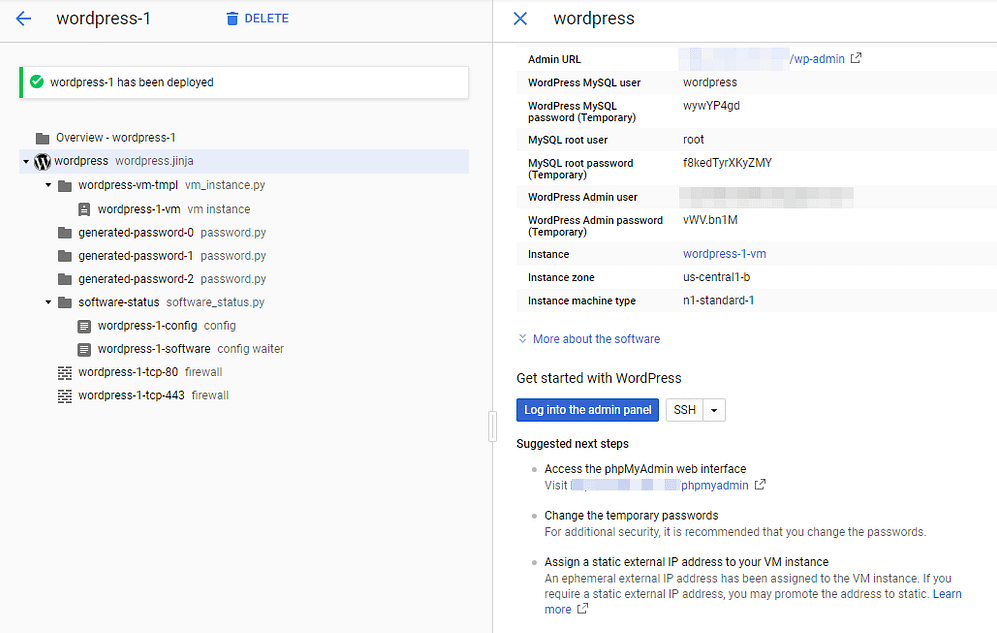
Note: This section includes your MySQL and WordPress admin users and passwords – you’ll want to change those as soon as possible.
At this point, you’re almost there. You just need to do a few more things before your website is ready for the public.
Step 3: Map a domain and set up an SSL certificate
Now that your website is operational in the cloud, there are a few items to review before calling it a day. Right now, your site is only accessible via an IP address, so you’ll want to map a custom domain to it as soon as possible.
Here are some suggestions for choosing a reputable domain registrar if you don’t already have one.
Given that you have enabled HTTPS traffic for your website, the next step is to set up an SSL certificate for it. Although this step isn’t absolutely necessary, Google and we both firmly believe in promoting HTTPS use.
After finishing these tasks, check your billing charges to make sure your free credits haven’t expired. Google Cloud will begin charging your selected payment method at the end of each month once they have done so.
Conclusion
The pricing model and hosting configuration options make this option very different from others, but using Google Cloud to host your WordPress website can pay off if you need highly scalable plans. Using cloud services can be a big change if you’ve only ever used ‘traditional’ hosting providers.
Here’s how to install WordPress on Google Cloud, in three steps:
On the other hand, managed WordPress hosting can be a better option if the aforementioned instruction left you feeling overburdened. even use the same Google Cloud infrastructure as managed WordPress hosts!
Do you have any questions about how to use Google Cloud with WordPress? Let’s go over them in the comments section below!